Trees and Transformations
A variety of natural phenomena exhibit self-similar or "fractal" structures, i.e., similar patterns that recur at progressively smaller scales:

In computer graphics, one simple way to model fractal behavior is to recursively apply the types of transformations we've been studying in class (rotation, translation, scale, etc.) to some graphical primitive (like a line segment or rectangle). Today, we'll build up a function that draws a fractal binary tree in 2D:
More specifically, we'll write a recursive routine that
- draws a single branch in the tree (as a rectangle), and
- recursively draws the (smaller) left and right branches.
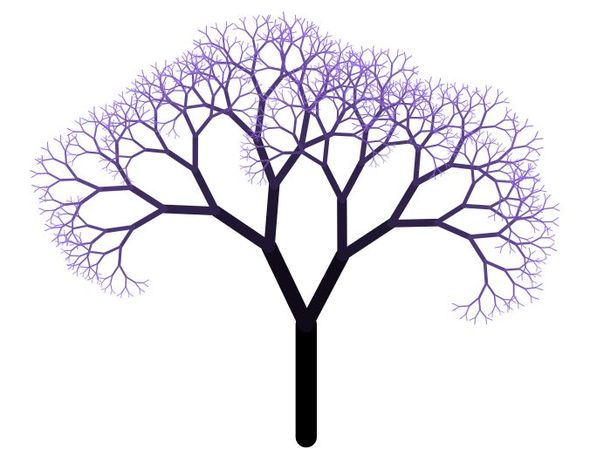
The only argument this function takes is the current depth of the tree. When the depth reaches zero, recursion terminates. Our challenge is to apply the right transformations at just the right moment, so that our output looks something like the tree depicted above.

Before getting into our recursive procedure, we need to figure out what transformation to apply to just a single branch. Suppose in particular that each branch is a rectangle of width w and height h. We will also specify a rotation angle theta and a scale factor s that determines how much to rotate and scale the next branch. What translation (x, y) should we then apply to make sure that the lower-left corner p of the next rectangle is on the top of the previous rectangle, and the lower-right corner q of the next rectangle is on the right of the previous rectangle? This calculation is a bit tricky, so we'll work it out step-by-step.
Let's first figure out the x translation. One way to think about this is to translate right by half the width of the bigger rectangle w/2, then left by the distance u0 from p to the right side of the bigger rectangle, then right again by the distance u1 given by half the width of the rotated rectangle.- (1a) How can we write the distance u0 as a function of the original width w, the scale factor s, and the angle theta?
- (1b) Suppose we know the angles alpha and theta and the distance R in the figure above. How can we get the distance u1?
- (1d) How do we get the distance R, i.e., the distance from a corner of the smaller box to its center?
- (1e) How do we get the angle alpha, i.e., the angle between this same diagonal and the left side of the smaller box?
Our final translation x is then w/2 - u0 + u1. From here we could do a similar calculation to get a translation y = h/2 - v0 + v1 (but for brevity we'll just give this to you in the code!).
Ok, let's write some code! Our basic routine will have the structure
drawSubTree( depth )
{
    if( depth == 0 ) return;

    // draw some geometry for the current edge

    // apply some transformations

    drawSubTree( depth-1 );

    // apply some transformations

    drawSubTree( depth-1 );

    // apply some transformations
}
Suppose we have at our disposal the following commands:
rotate( theta );    // rotate by an angle theta, in radians
translate( u, v );  // translate by (u,v)
scale( s );         // uniformly scale by a factor s
rect( x, y, w, h ); // draw rectangle with corner (x,y), width w, and height h
Assuming you already know the values x, y, theta, and s, which commands should you execute, in what order? Note: you should assume that the transformation in the last line of code gets applied first. For instance, if you write
rotate( theta );
translate( u, v );
rect( x, y, width, height );
then the rectangle will be translated then rotated.
This tree looks just a bit too symmetrical. Let's do two things to make it more interesting. First, let's add some randomness to the rotation angle. Next, how can we "kill off" some of the branches so that you don't always get a perfect binary tree?
So far we have a sad scraggly winter tree. Let's make a happier summer tree by adding some leaves. How do we decide when to draw leaves? Add some leaves by drawing green circles at just the right moment.
Our "leaves" look a little funny. Let's instead draw them as ovals, stretched out along the direction of the branch. What commmands should we add?
Now let's play with color a bit. First, how can we add some variation to the color of our leaves? Next, how do we adjust the color of the branches so that they're dark near the trunk, and lighter near the leaves?
Now go nuts! What else can you add to make your tree and the scene around it look beautiful? Add a sky? A ground? A lake? Some birds? The only limit is your imagination*!
(*And the cold hard reality of computational complexity...)
Implementation in HTML5 Canvas Sandbox
To actually implement this algorithm, you can try it out in the Codepen we've setup here:
This sandbox allows you to call drawing and transformation routines using HTML5 Canvas, which is a modern standard for drawing 2D graphics in a web browser. Most of the code has been written for you already. The basic idea is that you have a context, called ctx, which can make all sorts of draw calls. For instance, to draw a rectangle you can write
ctx.beginPath();
ctx.rect(-10,-40,20,80); // the four arguments specify x, y, width, height
ctx.fill();
Geometric transformations look nearly identical to the pseuedocode commands given above:
ctx.rotate( theta ); // rotate by an angle theta, in radians
ctx.translate( u, v ); // apply a horizontal translation u, and a vertical translation v
ctx.scale( a, b ); // scale by a in the horizontal direction and b in the vertical direction
ctx.rect( x, y, w, h ); // draw a rectangle with corner (x,y), width w, and height h
As above, transformations get applied in the order "last transformation first." And again, you should think about how transformations should get applied and then reversed as you go up and down the call stack.
Of course, you're welcome to get as fancy as you like here; here's a reference guide for more functions in Canvas.
Extra credit: take a screenshot of your own drawing and post it on Piazza! We will create a Piazza thread for results, so that we can see them in their full-color glory. We want to see what cool stuff you make. We definitely encourage creativity here - try changing the shape, size, color, style, branching factor... or anything else that makes your tree more beautiful!